Worried about how you’ll get your wedding dress bustled before your reception? Here’s some helpful tips from pros who do it every weekend!
Wedding dress bustles can have a bad reputation as a complex and difficult part of your wedding day. But I have to admit: I love them! I think of them as a kind of puzzle, with a beautiful final result! With my background in theatre and costumes, and tons of weddings under my belt, I have a fool-proof way to approach a bustle that will get you to cocktail hour with your guests in no time. One of the first things we do on a wedding morning is look at the wedding dress and the bustling points. This ensures that we’re ready and prepared to bustle you later in the day.
The Prep
All of this starts with your final appointments at the tailor. There’s a few different types of bustles, so carefully consider what works best for you and your dress style.
American / Over-Bustle:
An American, or over-bustle, has connection points on the back of the waistline, and on top of the train. Your tailor will either use buttons and loops of thread, or hook and eye closures. These allow the train to be lifted and draped over the top of the gown. Bustle points can vary from one button right on the center seam up to five pick-up points. This style of bustle well with dresses with fewer layers, and with lighter or more delicate fabrics.
Tips at the Tailor
- If you select an American bustle, have someone take a photo of you in the dress while the tailor marks the points. This serves as a helpful reference point on your wedding day!
- If your American bustle has more than one point, request that your tailor sew on each pair with a different color thread, so you know which pairs to connect.
- Ask the tailor to mark the loop/eye placement on your train with a small pearl bead underneath the top layer. This allows your helpers to feel underneath the top layer to find the connection point, and is especially important with a heavy beaded or lace dress!
French / Under-Bustle:
A French or under-bustle raises a wedding dress train by tucking it underneath the skirt, creating a soft, billowy effect at the back. Matching sets of ribbons are used to pull the two points together, then tied. You’ll most often find this type of bustle used with A-line, sheath, mermaid, and trumpet gowns.
Tips at the Tailor
- If your bustle will be constructed with ribbons, ask the tailor to number or color code the pairs. This will help the person bustling you to know which ones to connect.
- Occasionally, a tailor will construct a French bustle with hook and eye closures instead of ribbons. Just like with an American bustle, ask them to sew each matching pair on with a different color thread.
Waltz / Invisible Bustle:
A Waltz bustle, also called an invisible or ballroom bustle, flips the train up and underneath the skirt. This results in a clean hemline, and makes your dress look like it never even had a train a all! This style can often be more expensive, as it usually requires more points than the American or French styles. However, the clean lines this bustle creates are worth it in my book! This style of bustle works best with slimmer skirts, and fabrics without much lace or beading.
Tips at the Tailor
- Just like with an American bustle, ask your tailor to sew on each pair with a different color thread, so you know which ones to connect.
Your tailor may also include a large loop on your train meant to help you carry it throughout the day, but these are typically not part of the bustle. The long carrying loops are usually tucked up with the train when bustling. If it still shows once you’re bustled, it can be tucked away with a small safety pin to insure it doesn’t get stepped on.
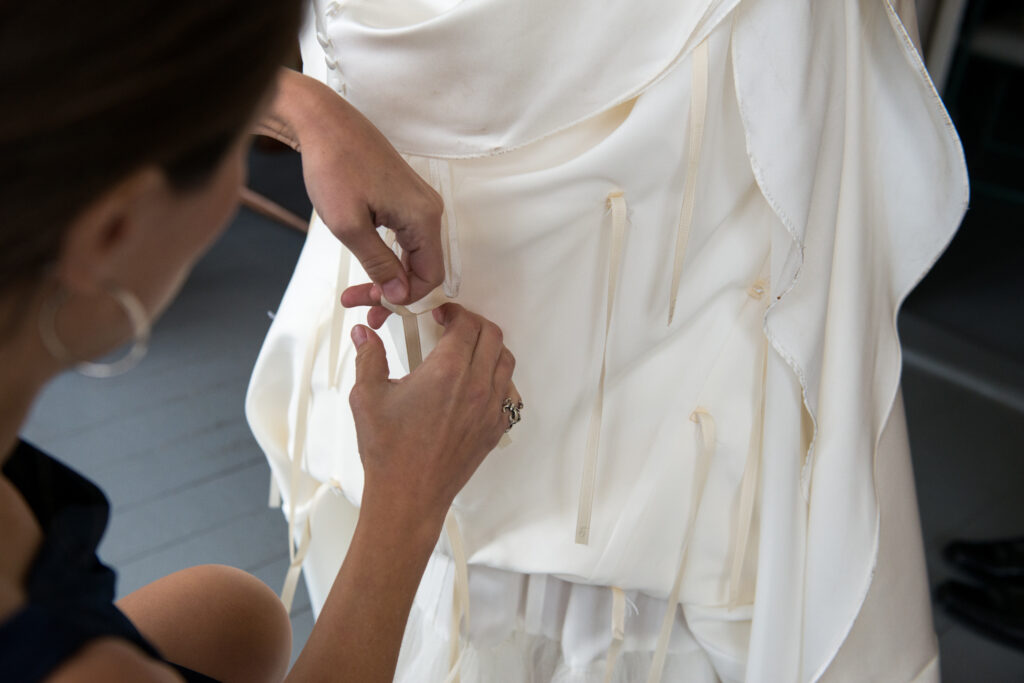
Getting Started with All Bustle Types
The most important element of a successful bustle is patience! I’ve seen many a bride be late to her cocktail hour because her helpers were jumping to connect the first points they saw, without checking first to make sure all the right Point As were being connected with the right Point Bs. No matter what you select for your bustle, it’s important to make sure all bustle points are found and matched before you start connecting them. This gives you the chance correct any mistakes before making them, and reduces time wasted trying to find a missing point.
I also recommend to our clients that we keep the number of helpers as small as we can. I’ve often found it goes the fastest with just myself, the bride, and either the groom or my assistant as an extra set of hands. It’s true what they say about having too many cooks in the kitchen! This is one task you can leave to the pros, and let your mom and bridesmaids enjoy cocktail hour.
To begin –
- Spread out the skirt and train flat on the floor. Make sure it lies even from side to side, and the center of the train is aligned with the center of the bodice.
- Find the middle point first, usually by following the center back seam of the dress.
- Once you have the center point, you can find the mirrored points on each side by either following the other seams, or looking for other mirrored elements in the fabric.
- Follow the guidelines below, depending on what bustle style you’ve selected.
- Once you think you’re done, give it a fluff!
- Then, check to make sure the bustle is even, and that no points were missed.
For an American / Over Bustle:

- Make sure to take note of how many anchor points there are in total. Again, these are usually located on the waistline and can either be white hooks or clear buttons. Sometimes they are covered in lace or fabric to blend in with the dress material.)
- Mark loops on the train as you find them. Waiting until all loops are found before buttoning ensures you’re not accidently losing loop #2 because you’ve already buttoned up #1 and #3 around it. I like to use knitting stitch markers, as the bright colors are easy to spot and the plastic prevents accidental pokes. If you don’t have a fiber artist around to lend any, bobby pins or safety pins will also work in a pinch.
- Many wedding guides will suggest a crochet hook, but I think it’s best with two! Those tiny loops can be tricky to pull over the buttons, especially if you have longer nails. Make sure that the crochet hook you have is a smaller size. Size G (4.0 mm) works best in our opinion.
Once you find all the bustle points, you can start connecting them. I start from the center point and work my way out down each side to ensure nothing gets lost.
(Crochet hooks are also handy to have around while you get dressed! Even if your dress closes with a zipper and only has decorative buttons, those buttons do often have loops to be fastened with.)
Tips for French / Under Bustle
- Make sure to note how many ribbon pairs there are in total.
- If the ribbons weren’t marked or color coded by your tailor, make sure that you know which two are to be tied together before you start knotting them.
- In addition to the person doing the bustling, it’s helpful to have a couple of people hold the skirt up around them. This is especially important if you have a long and heavy skirt with lots of layers! You want to ensure there’s no fabric drooping in between the ribbons as they’re getting tied.
Once you’ve found all the matching points, you can begin tying them. Again, I like to start in the center and work my way outwards.
Tips for Waltz / Invisible Bustle
- I find that Waltz bustles are easiest to connect by having the bride and another helper lift the back of the train up behind her head, almost like a peacock’s tail!
Unlike the American and French bustles, I’ve found that Waltz bustles are easiest to connect by moving straight across the points, from one side to the other.
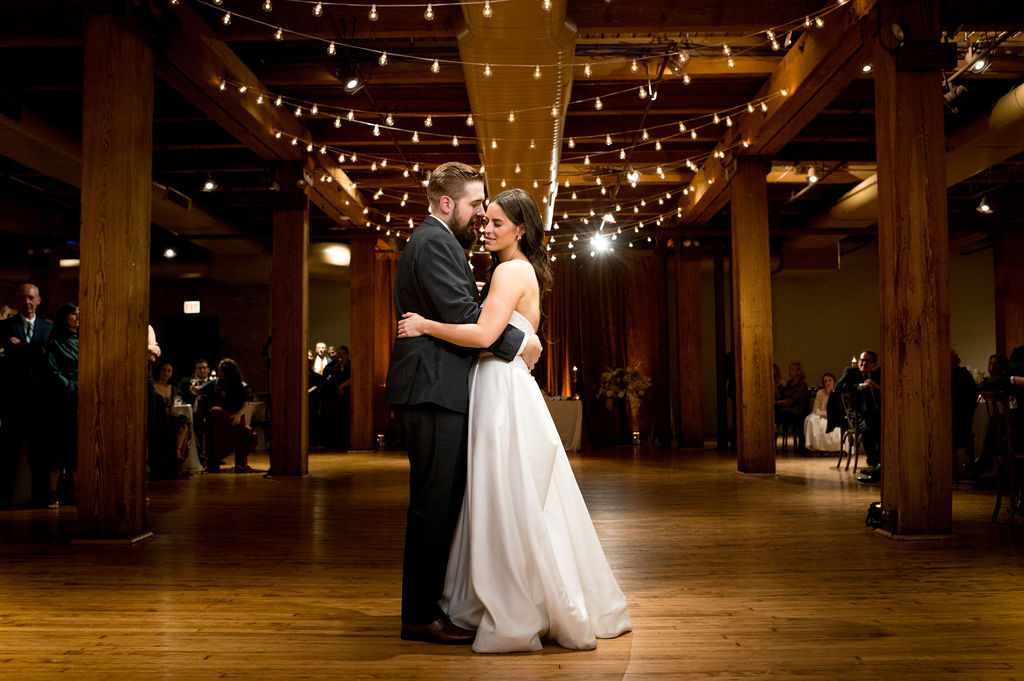
When to Bustle your Dress
As wedding planners, we find the best time to bustle the dress is right before joining your guests at cocktail hour. It can be a little hard to navigate a crowded room without someone stepping on your train. It’s also easier if you’re kicking dinner off with your first dance. Just make sure you designate at least 10 minutes in your timeline for bustling. It helps to have a clear open space to spread the train out in, and good lighting so that your helpers can find all the bustle points.
If Your Bustle Breaks
Don’t panic, it happens! Wedding dress skirts are a lot of weight on those tiny buttons. Safety pins or diaper pins can work, but we recommend a clothes tagger with short plastic barbs. This allows you to quickly redo a bustle point. I’ve even given a bridesmaid’s dress a rough hem with a few points later in the night once she’d taken off her heels, so she wasn’t stepping on the dress in her sneakers!
Final Thoughts: Bustle with Confidence!
With the right preparation, a little patience, and a few pro tips, bustling your wedding dress can be a seamless part of your big day—so you can get back to celebrating with ease!
Have you chosen your bustle style yet? Share your thoughts or any questions in the comments below! And if you found these tips helpful, be sure to save this guide and share it with a fellow bride-to-be!

Allison Sparrow is a wedding day management coordinator for The Gilded Aisle Weddings. Allison has a degree in theatrical stage management from Loyola University Chicago, and is a certified Project Management Professional.
+ COMMENTS
ADD A COMMENT